|
- Tuning the Bottom Head -
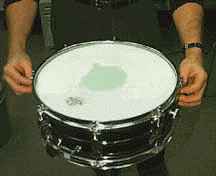
This is the part I really hate! As I've mentioned before, the SNARE HEAD or bottom head is much thinner than the batter head because it must be able to vibrate to allow the snares to respond. Treat the snare head with caution! It's very easy to damage!
Let me start by saying: unless the snare head looks in bad shape, I'd encourage most beginners to not bother taking the snares and counter hoop off to clean it the way we did with the top head. Chances are that it's not nearly as dirty because it's facing down, not up. Most of the reason lies in the fact that you can mess up the snares with very little effort (and it's a real pain).
Taking off the bottom head
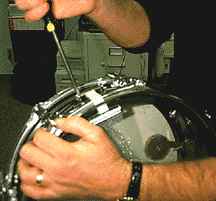 
First you must disconnect the snares from the snare strainer. Every drum is different so I can't go into great detail here. Most have two screws located at the bottom of the snare strainer or on the opposite side of the drum where the back end of the snares are connected- loosen those two screw just enough to pull the cord or plastic strip free. Don't loose these two screws - they're small enough to blend in with that shag carpeting still found in most houses in Arkansas!
|
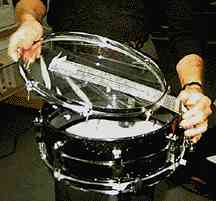 After you've taken off all of the tension rods, you should be able to pull the counter hoop off the drum. Take care that the snares pull free of the counter hoop without catching. If you can get by with just disconnecting ONE SIDE of the snare strainer, congratulations! You can now go through all of the steps above to clean the tension rods and tune the bottom head. Don't forget that when you put the counter hoop back on the drum, the holes (or "snare gate") MUST line up with the snare stainer! There's nothing like the feeling you get when you completely tune the bottom head & discover that the snare gate is on the wrong part of the drum! It helps to "thread" the snares through the gate on the counter hoop BEFORE putting the lugs back on!