|
A good drum is pretty much indestructible, provided that you don't drop it off the roof of your house, BUT you can take several steps to keep it in good working order. If you bought your drum new (it's still in the plastic bag), then there's a good chance that it's still clean. However, if you bought the drum USED, you don't know WHERE its been! Here's some spring cleaning tips that my percussionists do at least once a year on my high school's equipment:
The Top Head First!
Start by taking off the top head. With the drum key (noooo, don't use a pair of pliers!), loosen each tension rod & put it aside. Pull the rim off of the shell & wipe it down with some Windex or "Goo-Gone" (especially if you bought the drum from some giging country drummer - there's probably a ton of cigarette ashes between the head and the rim)!
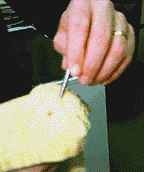
Next, pull the head off the drum shell and wipe down the top edge of the shell (this is called the "bearing edge"). If you really want do it right, rub a little PARAFFIN WAX on the bearing edge - just enough for a light coat, not so much that there are big globs of it. The wax will help make the head slide smoothly over the bearing edge as you tighten the head in the tuning process. |
 It's time to give those tension rods a good cleaning. Chances are, they are black & coated with old grease and grime! A little bit you can live with, but if you've got nothing better to do - give them a quick bath with some "grease cutting" dishwashing liquid. Remember to not use Mum's good towels - you WON'T be able to get the stains out (I'd go with an old pair of underwear or socks). If you want a quick cleaning job, just wrap your cloth around the bottom of the lug and hold tightly while you "unscrew" it out of your grip. Now inspect it closely: if all of the big chunks of gunk are gone, then you're in good shape.